5 Effective Ways To Fix AirPods Flashing Green Issue
There are various ways to fix AirPods flashing green lights, depending on the root cause of the issue. By charging your AirPods, updating the firmware, resetting them, cleaning them, or contacting Apple Support, you can troubleshoot the issue and ensure that your AirPods are in optimal condition.
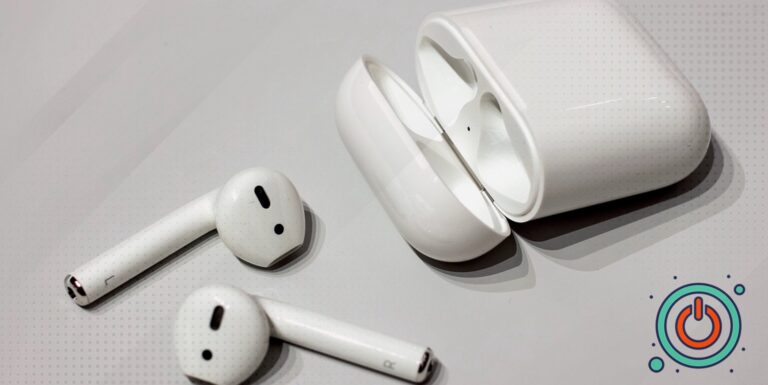
The Apple AirPods have become one of the most popular wireless earbuds in the market today. They offer convenience and comfort with a sleek design and excellent audio quality. However, like any other electronic device, AirPods can encounter issues that may hinder their performance. One of the most common issues AirPods users encounter is the flashing green light. This issue can be frustrating and concerning, especially for users unfamiliar with the different indicators of the AirPods.
Addressing the issue of AirPods flashing green is important for maintaining the functionality of your AirPods. The green light on the AirPods indicates different things, such as charging status, firmware update, or malfunctioning devices. Therefore, it is crucial to understand the different types of green light flashes and what they mean. It will help you identify the root cause of the issue and determine the appropriate steps to take to fix it. The next section will explain the meaning behind the green flashing light on your AirPods.
In this article, we will provide you with a troubleshooting guide on how to fix AirPods flashing green. We will explain the different types of green light flashes and what they mean. We will also guide you step-by-step on troubleshooting your AirPods to resolve the issue. Additionally, we will provide tips on maintaining your AirPods to prevent future issues.
Why Are My AirPods Flashing Green?
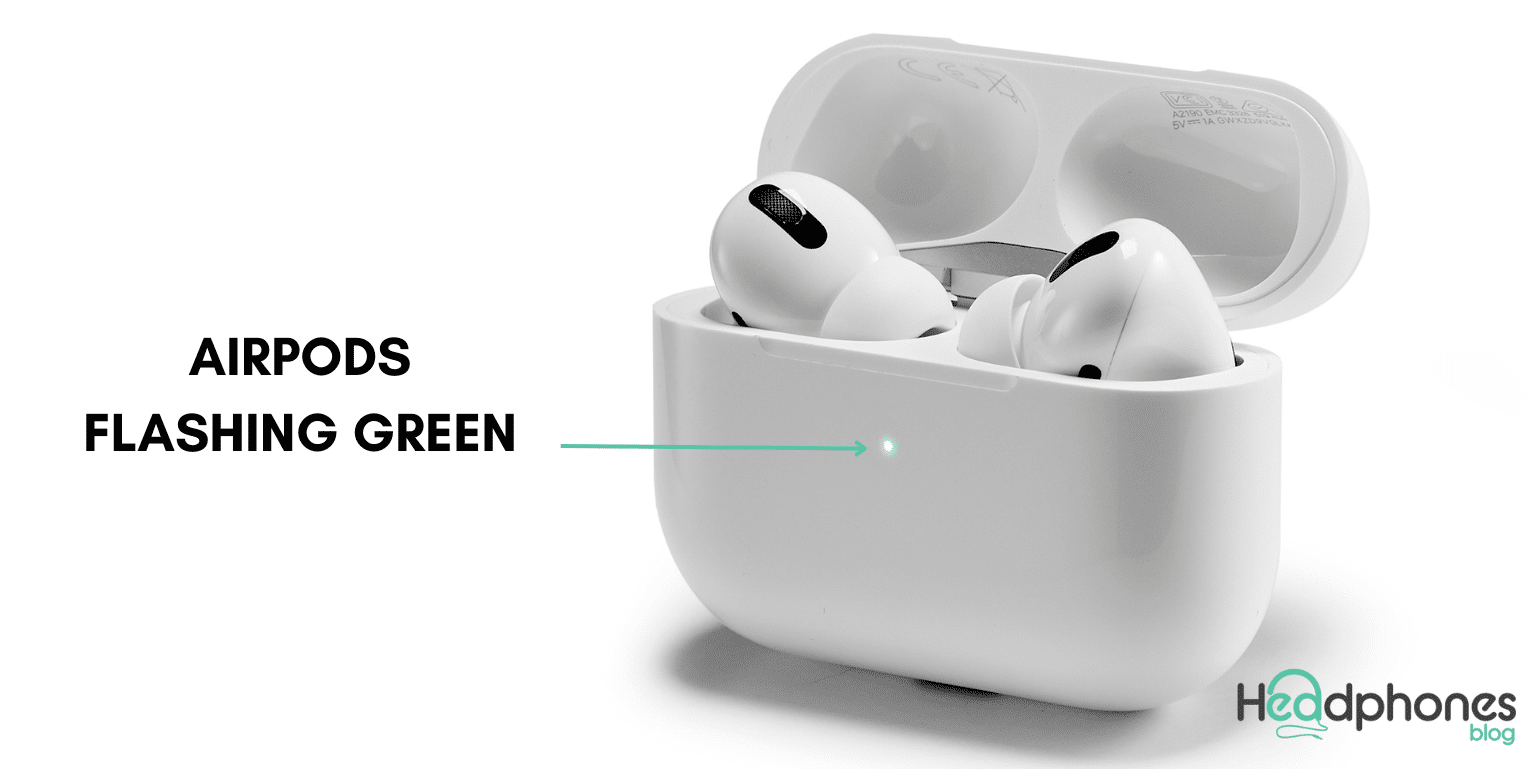
One of your AirPods may not be recognized by the case if there is a green flashing light, even though Apple has no anecdotal evidence of this. It’s possible that the AirPods’ battery is low or that there is a problem with the pairing procedure.
If your green status light is flashing, the case may not detect one of your AirPods. It might be caused by the AirPod’s battery running low or by a pairing issue where the AirPods fail to recognize each other as a pair.
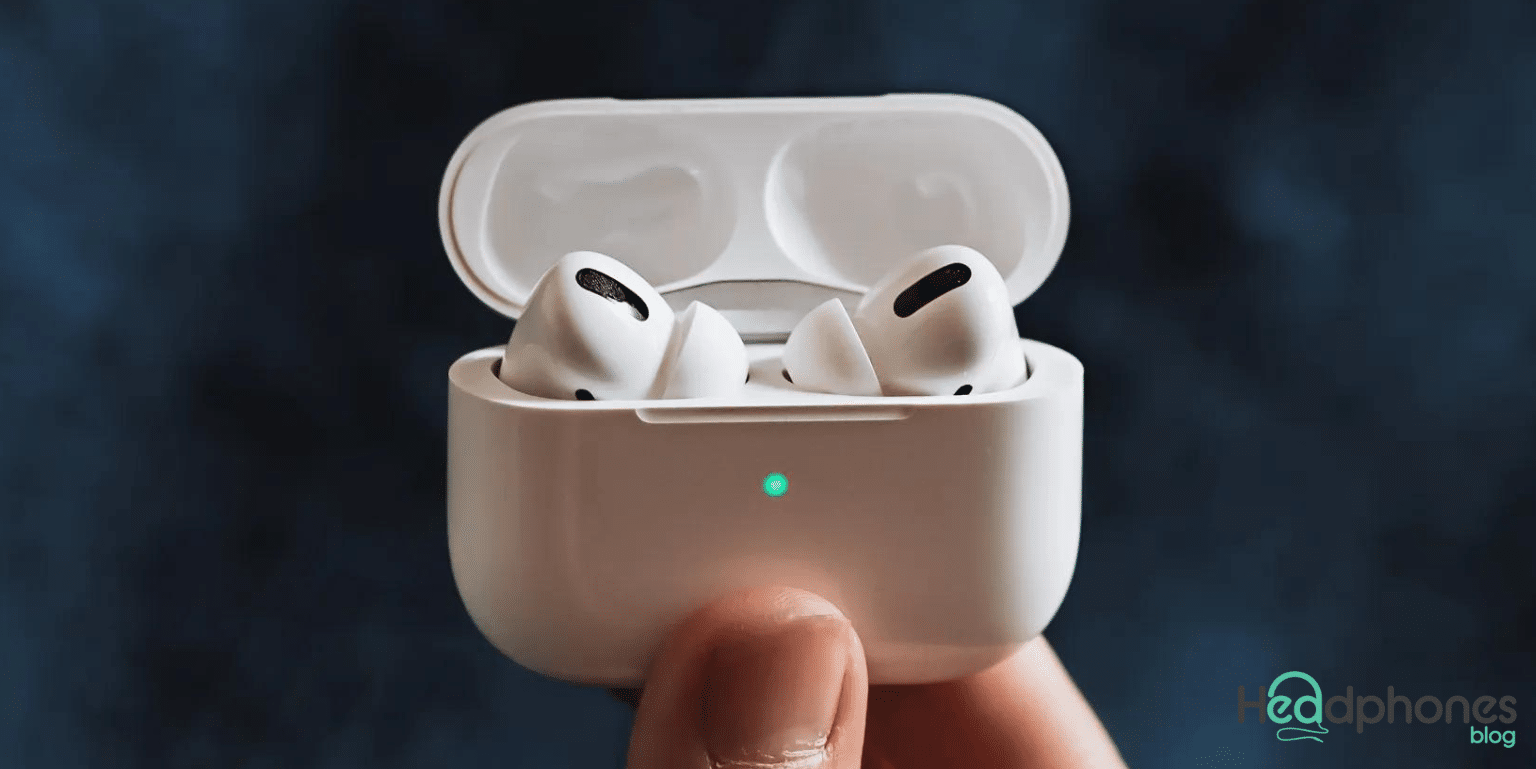
Normally, a static green AirPods status light means that the case or the AirPods have enough charge. The light represents the AirPods’ battery if they are inside. Otherwise, it displays the battery level of the case.
But what does an AirPods green light that is blinking or flashing mean? The flashing green lights could be a sign of several issues, including:
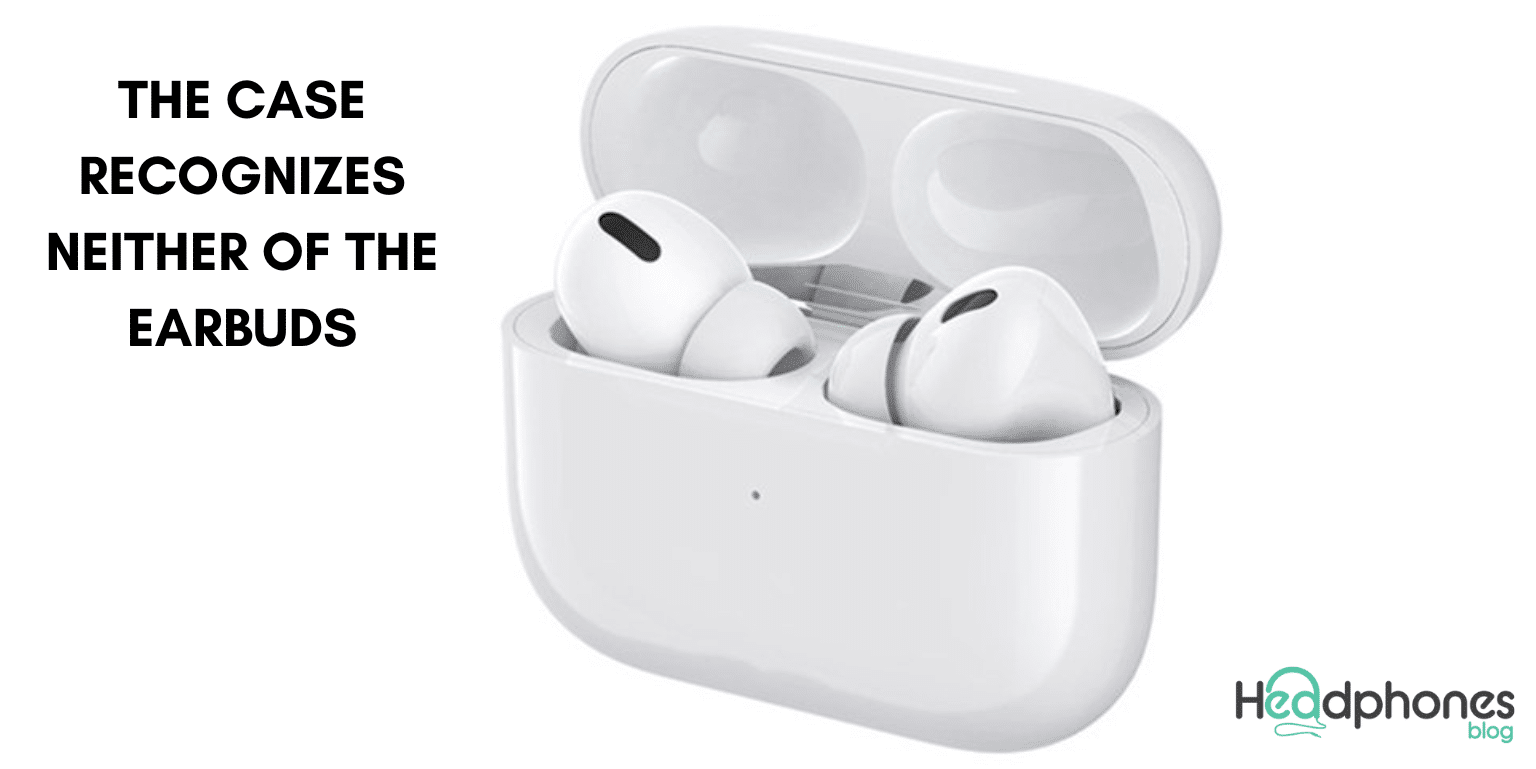
- One of the AirPods needs to be recognized by the case: Both the left and right AirPods are recognized by the case for your AirPods.
- The firmware for the AirPods needs to be updated. Firmware updates are typically released to address problems with the AirPods.
- The dirt accumulation inside the AirPods’ case is to blame for one of them not charging properly.
- If you recently dropped or got your AirPods wet, hardware damage may be inside. One of the AirPods is damaged.
Common Reasons Behind Airpods Flashing Green
If you own a pair of Apple AirPods, you may have experienced the frustrating issue of AirPods flashing green. The green light on your AirPods can indicate several things, including charging status, firmware update, or a malfunctioning device. This section will explore the common reasons why AirPods flash green and what they mean.
1. AirPods Charging Issue
One of the most common reasons why AirPods flash green is that they are in the process of charging. When you place your AirPods in the charging case, the LED light on the front of the case shows the charging status of your AirPods. A flashing green light indicates that the AirPods are currently charging and are not yet fully charged. Once the AirPods are fully charged, the green light will turn off.
It’s important to note that if your AirPods are not charging, the green flashing light may indicate that there is an issue with the charging case or the connection between the AirPods and the charging case. In this case, cleaning the charging contacts on the AirPods and the charging case is recommended to ensure proper connectivity.
2. AirPods Firmware Update
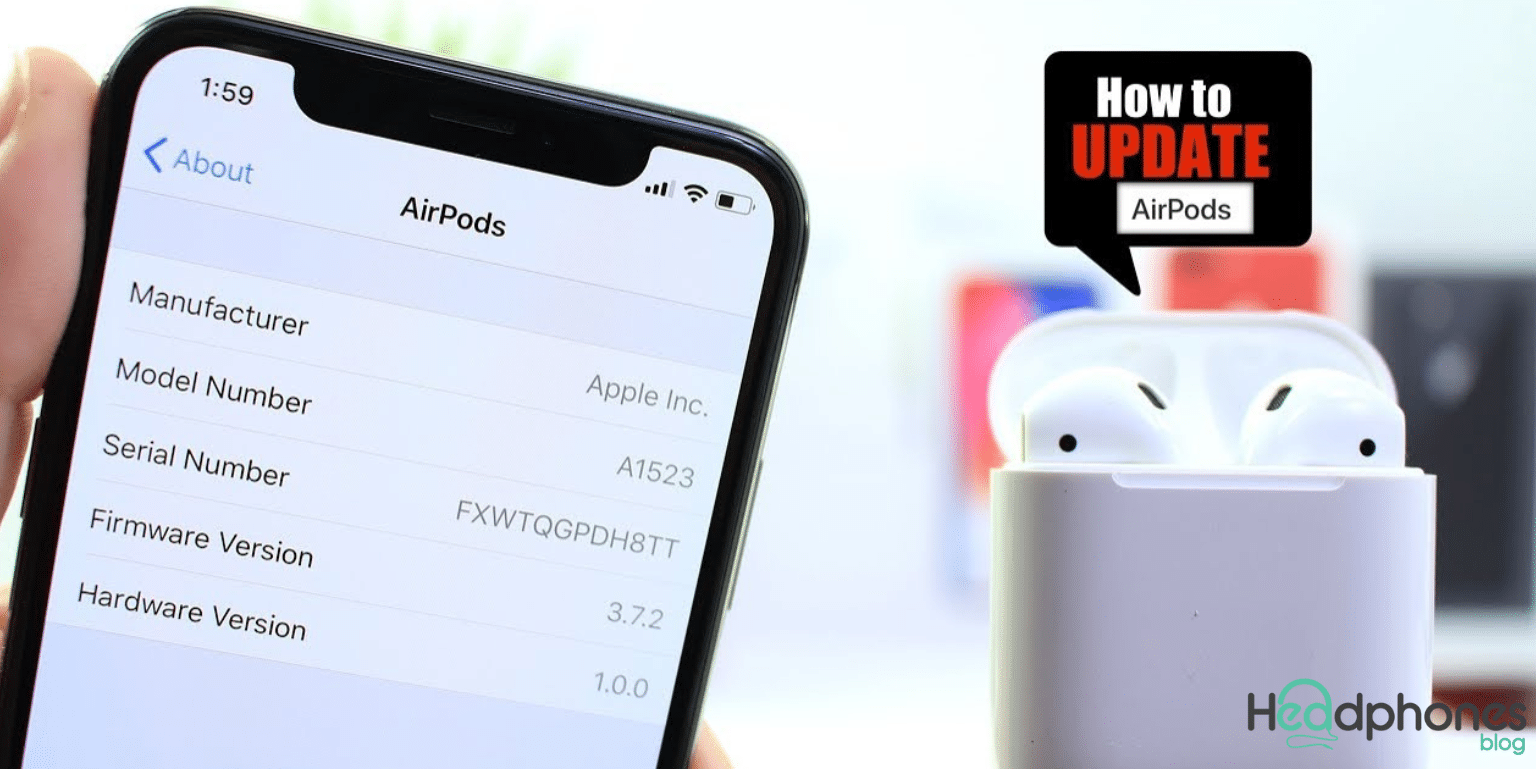
Another reason AirPods flash green is when a firmware update is available. Apple periodically releases firmware updates for the AirPods to improve performance and fix bugs. When an update is available, your AirPods will automatically download and install the update, which will cause the green light to flash. Once the update is complete, the green light will turn off.
To check if your AirPods are up to date, you can go to the Settings app on your iPhone or iPad, select “General,” then “About,” and finally select “AirPods” to see if there are any available updates. Keeping your AirPods updated ensures optimal performance and avoids potential issues.
3. Damages and Malfunctions
If your AirPods are flashing green but are not charging or updating, it may indicate that there is a malfunction with the device. Various factors, such as physical damage, water damage, or internal hardware issues, can cause this. In this case, you may need to contact Apple Support or take your AirPods to an authorized service center for repair or replacement.
It’s important to note that attempting to fix the issue yourself, such as opening the AirPods or charging case, may further damage the device and void the warranty. Therefore, it’s best to seek professional assistance for this issue.
4. Low Battery Life
Finally, AirPods may flash green when the battery is low. When the battery level of your AirPods is low, the green light on the charging case will flash to indicate that it’s time to charge the device. Charging your AirPods when the battery level drops below 20% is recommended to avoid complete depletion.
To check the battery level of your AirPods, you can open the charging case near your iPhone or iPad, and the battery status will appear on the screen. You can also check the battery status of your AirPods in the Control Center by swiping down from the top-right corner of your iPhone or iPad.
Understanding why AirPods flash green is crucial for maintaining functionality and avoiding potential issues. Whether it’s charging, updating firmware, malfunctioning, or low battery life, various factors can cause the green light to flash. Knowing how to troubleshoot these issues ensures that your AirPods are in optimal condition and provide you with the best listening experience.
5 Ways of Fixing Airpods Flashing Green Lights
AirPods are a popular and convenient accessory for many iOS device users. However, like any other electronic device, AirPods can encounter performance issues. One common issue that AirPods users may encounter is a flashing green light on the charging case. This flashing light can indicate various issues, such as a low battery, firmware updates, or hardware problems. If you are experiencing the flashing green light issue, don’t worry – there are several ways to fix it.
1. Charge your AirPods
The most common reason why AirPods flash green is that they are in the process of charging. To fix this issue, place your AirPods in their charging case and connect the charging cable. Ensure the charging contacts on the AirPods and the case are clean and properly connected. Once the AirPods are fully charged, the green light will turn off.
- Place your AirPods in their charging case.
- Connect the charging cable to a power source.
- Ensure the charging contacts on the AirPods and the case are clean and properly connected.
- Wait for the AirPods to fully charge.
- Check if the green light turns off.
2. Update AirPods Firmware
If your AirPods are flashing green due to a firmware update, you can fix the issue by updating the firmware. To do this, ensure that your AirPods are connected to your iOS device and that both are connected to the internet. You can then check for updates in the Settings app on your iPhone or iPad.
- Ensure that your AirPods are connected to your iOS device.
- Ensure that your AirPods and iOS devices are connected to the internet.
- Open the Settings app on your iOS device. Go to “General” > “About” > “AirPods.”
- Check for available updates.
- Follow the prompts to update the firmware.
- Wait for the update to complete.
- Check if the green light turns off.
3. Reset your AirPods
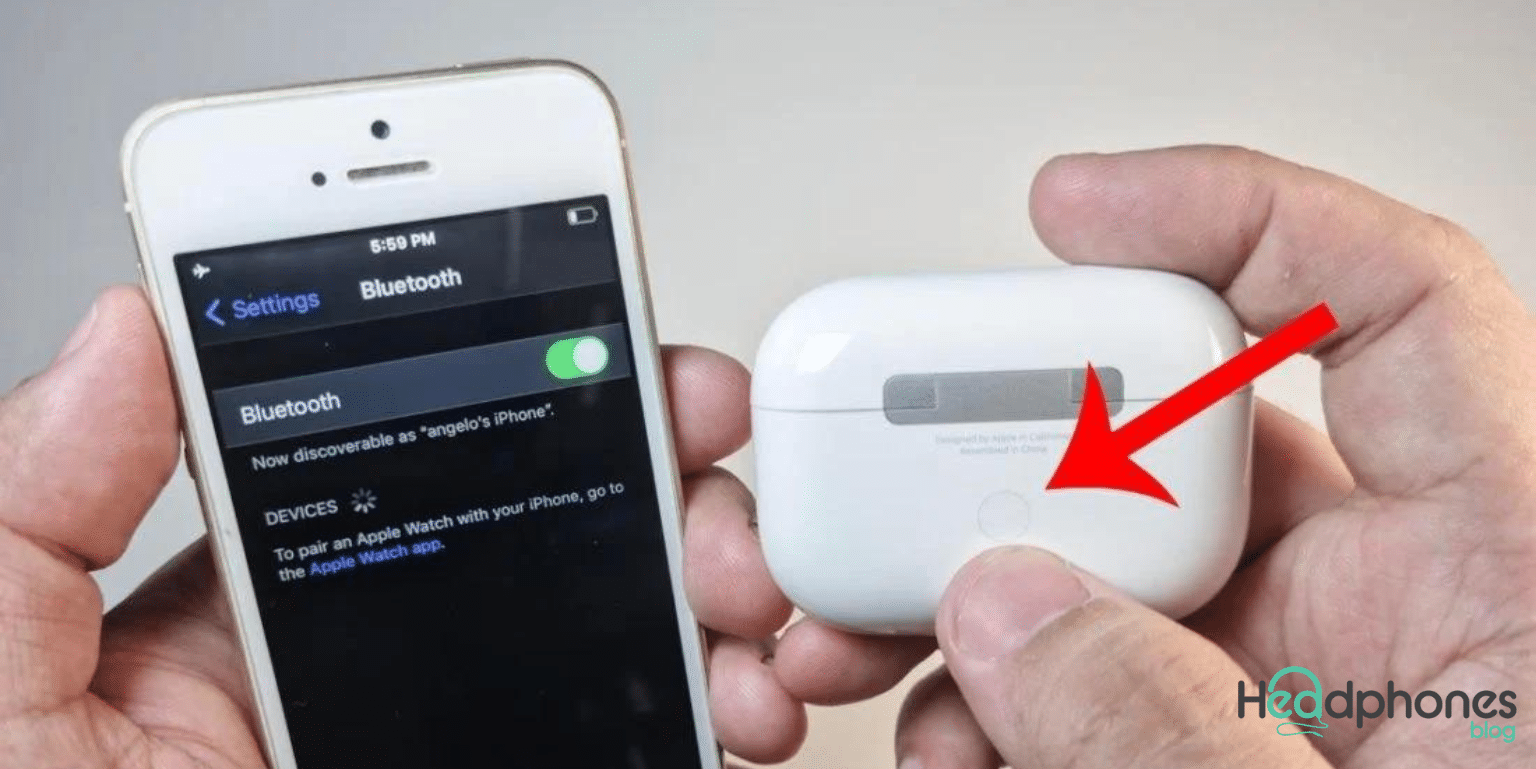
If your AirPods are still flashing green after charging and updating the firmware, you can try resetting them. This will erase all the settings and configurations on your AirPods and restore them to their default settings. To reset your AirPods, place them in their charging case and press and hold the button on the back of the case until the LED light on the front of the case flashes amber. After this, re-pair your AirPods with your iOS device.
- Place your AirPods in their charging case.
- Press and hold the button on the back of the case until the LED light on the front of the case flashes amber.
- Repair your AirPods with your iOS device.
- Check if the green light turns off.
4. Clean your AirPods

Sometimes, the flashing green light on your AirPods can be caused by dirt, dust, or debris on the charging contacts. You can clean your AirPods using a soft, dry, lint-free cloth or a small brush to fix this. Be gentle when cleaning the charging contacts to avoid damaging them.
- Remove your AirPods from the charging case.
- Inspect the charging contacts for any dirt, dust, or debris.
- Use a soft, dry, lint-free cloth or a small brush to gently clean the charging contacts.
- Make sure to clean both the AirPods and the charging case.
- Re-insert your AirPods into the charging case.
- Check if the green light turns off.
5. Contact Apple Support

If none of the above steps work, it may indicate that there is a hardware issue with your AirPods. In this case, it’s recommended to contact Apple Support or take your AirPods to an authorized service center for repair or replacement.
- Go to the Apple Support website or call the support center.
- Explain the issue with your AirPods.
- Follow the prompts to receive assistance.
- If necessary, take your AirPods to an authorized service center for repair or replacement.
There are various ways to fix AirPods flashing green lights, depending on the root cause of the issue. By charging your AirPods, updating the firmware, resetting them, cleaning them, or contacting Apple Support, you can troubleshoot the issue and ensure that your AirPods are in optimal condition.
How to Prevent Future AirPods Issues
AirPods are a popular and convenient accessory for iPhone, iPad, and other iOS device users. They offer a wireless and hassle-free listening experience and can be easily carried around in a small charging case. However, as with any electronic device, AirPods may encounter issues that can affect their performance and cause frustration for the user. While there are ways to fix these issues, it’s always better to prevent them from happening in the first place.
4 Tips for Maintaining AirPods to Prevent Future Issues
Here are some tips and tricks on how to prevent future AirPods issues.
1. Keep your AirPods clean.
Cleaning your AirPods is one of the most important things you can do to prevent future issues. Dirt, dust, and earwax can accumulate on the earbuds and inside the charging case, interfering with charging and affecting sound quality. To clean your AirPods, use a soft, dry, lint-free cloth to wipe down the earbuds and charging case. You can also use a small brush to remove debris from the charging contacts.
Avoid using water or cleaning products on your AirPods, which can damage the internal components. Also, make sure to remove your AirPods from your ears and the charging case before cleaning them. Keeping your AirPods clean can prevent issues like reduced battery life and poor sound quality.
2. Avoid exposing your AirPods to extreme temperatures.
Exposing your AirPods to extreme temperatures can damage the internal components and affect their performance. Avoid leaving your AirPods in a hot car or exposing them to direct sunlight for an extended period of time. Similarly, avoid exposing your AirPods to extremely cold temperatures, such as leaving them outside in freezing weather.
If you need to use your AirPods in extreme temperatures, make sure to acclimate them to the temperature slowly. For example, if you are going from a warm indoor environment to a cold outdoor environment, let your AirPods adjust to the temperature gradually. Avoiding extreme temperatures can prevent issues like reduced battery life and connectivity problems.
3. Store your AirPods properly.
Proper storage is essential for maintaining your AirPods and preventing damage. When you’re not using your AirPods, make sure to store them in the charging case. This will protect them from dust, dirt, and other debris accumulating on the earbuds. It will also help ensure that your AirPods are fully charged and ready to use when needed.
When storing your AirPods, make sure to keep them away from other electronics and magnets. Magnets can interfere with the charging process and affect the performance of your AirPods. Additionally, make sure to keep your AirPods out of reach of children and pets, as they can be easily lost or damaged.
4. Be gentle with your AirPods.
AirPods are small and delicate and can be easily damaged if mishandled. Be gentle when inserting and removing them from your ears and the charging case to prevent damage. Also, avoid dropping your AirPods or exposing them to impact or pressure.
If you accidentally drop or damage your AirPods, take them to an Apple Store or authorized service provider for repair. Attempting to repair them yourself can cause further damage and void your warranty.
How to Properly Clean AirPods
Properly cleaning your AirPods is essential to maintaining their functionality and prolonging lifespan. Over time, earwax, dirt, and other debris can accumulate on your AirPods, impacting their performance and sound quality. Here are some tips on how to properly clean your AirPods:
1. Use a soft, dry cloth.
To clean your AirPods, use a soft, dry cloth. Avoid harsh chemicals or abrasive materials, which can damage the AirPods’ surface. Gently wipe the surface of the AirPods and charging case to remove any dirt or debris.
2. Use a clean, dry toothbrush.
For stubborn grime or dirt, use a clean, dry toothbrush to gently scrub the surface of the AirPods and charging case. Ensure to avoid getting moisture or liquid inside the AirPods or charging case, as this can damage their electronic components.
3. Use rubbing alcohol.
If your AirPods are particularly dirty or have stubborn stains, you can use rubbing alcohol to clean them. Apply a small amount of rubbing alcohol to a soft cloth or cotton swab and gently rub the surface of the AirPods and charging case. Make sure to avoid getting any liquid inside the AirPods or charging case.
4. Clean the mesh grilles.
The mesh grilles on the AirPods can become clogged with earwax or other debris, which can impact their sound quality. To clean the mesh grilles, use a dry cotton swab and gently wipe the surface of the grille. Avoid using water or other liquids, as this can damage the AirPods.
Best Practices for Charging AirPods
Charging your AirPods properly ensures they have a long lifespan and maintain functionality. Here are some best practices for charging your AirPods:
1. Use the original charging cable and adapter.
When charging your AirPods, make sure to use the original charging cable and adapter that came with them. Using third-party cables and adapters can cause damage to your AirPods and potentially reduce their lifespan.
2. Charge them in the charging case.
The AirPods are designed to be charged in their charging case, protecting them when unused. When not in use, make sure to keep your AirPods in their charging case to keep them charged and ready for use.
3. Don’t overcharge them.
Overcharging your AirPods can damage the battery and reduce their lifespan. Ensure you remove your AirPods from the charging case once fully charged. You can check the battery level of your AirPods by opening the charging case near your iPhone or by checking the battery widget on your iPhone.
4. Keep the charging case clean.
To ensure that your AirPods charge properly, keep the charging case clean. Use a soft, dry cloth to wipe the surface of the charging case and remove any dirt or debris. Avoid harsh chemicals or abrasive materials, which can damage the charging case.
5. Store them properly.
When not in use, make sure to store your AirPods in their charging case to protect them and keep them charged. Avoid exposing your AirPods to extreme temperatures or humidity, which can damage their battery and reduce lifespan.
Other AirPods Lights: What They Mean
Let’s examine some common lights and what they mean.
- Flashing white light – will occur as soon as you press the connection button on the charging case’s bottom. The AirPods are in pairing mode when the indicator light flashes white; at this point, you can begin a new Bluetooth connection with a different device.
- Green light when AirPods are in the case – When you place your AirPods inside the charging case, if the LED turns green, both the AirPods and the case are fully charged.
- Green light when the case is empty – While the green led on the charging case is on, there is no need to plug in your AirPods. It denotes the filing of charges in the case.
- Amber light when the case is empty – You must recharge your case’s battery because it is running low.
- Red light when AirPods are inside – If the LED light on the case changes from green to red as soon as you connect your AirPods, they need to be recharged.
- Green light when connected to a power source – The AirPods case can now be safely unplugged from its power source.
- Flashing amber light – signifies that your AirPods have experienced a pairing fault. Instead, you must reset them by briefly pressing the connection button on the back of the device before attempting to reconnect.
Frequently Asked Questions
Here are some of the frequently asked questions about AirPods flashing green. Continue reading!
Why are my AirPods flashing green?
If your green status light is flashing, the case may not detect one of your AirPods. This could be due to the AirPod not having enough battery or a pairing issue that causes AirPods not to recognize each other as a pair. A static green AirPods status light typically indicates that the case or the AirPods have sufficient charge.
What does a flashing green light on AirPods mean?
A green light indicates that your battery is fully charged (with AirPods, just in case). The AirPods and the case are both fully charged if you have them in the case, and you can see a green light.
How do you reset AirPods flashing green?
Restore both AirPods to the case and charge it for at least 15 minutes if there is a flashing green light and only the left or right AirPod is detected. Ensure Bluetooth is turned on and connected to your AirPods on your device. To reset your AirPods, unpair them and hold the setup button down.
Why are my AirPods flashing orange and green?
Greenlight: AirPods and case are fully charged (connected to a power source). Flashing green light: One of your AirPods might not be detected by the case. Your AirPods are experiencing a pairing error if they are flashing amber or orange. When there is a problem, AirPods flash orange. They will refuse to flash white when pairing is impossible. To provide additional information, the indicator light has the ability to change to a few other colors.
Why is my AirPods blinking green?
To paraphrase them in their own words, they connected the battery. Almost all Apple users have encountered issues while using AirPods. Many people have complained that their Airpods won’t connect or that the light is blinking green rather than white.
How do I know if my AirPods are not charging?
Charge or Check? Open the Smart Case if you have AirPods Max, then hold the case against your iOS device. Under your AirPods, a charging icon should be next to the battery icon. If your AirPods still don’t charge, contact Apple Support.
How long does it take an AirPod to charge fully?
The charging case will direct all power into the AirPods until they reach full battery life. The case will now start generating power for itself. In other words, if the charging case and AirPods are dead, they will take under two hours to fully charge.
Why won’t my AirPods charge or work?
Check to see if the charging icon appears next to the AirPod when you bring the AirPods close to your iPhone after removing any extras, such as foam ear tips. If the AirPod still doesn’t charge, it may be necessary to clean the Charging Case, AirPod stem, or contacts if they are dirty.
Can the AirPods case be overcharged?
Once the battery is fully charged, your AirPod case will stop charging. As a result, it is secure to leave the case attached to a lightning cable or place it on a Qi mat overnight. There will not be any consequences or overcharging. Additionally, secure is using another person’s case to charge your AirPods.
What is a factory reset for my AirPods?
Similar ease applies to Apple AirPods Max reset. Press and hold the noise control and digital crown buttons for 15 seconds or until the LED flashes amber and then white to factory reset the AirPods Max. After that, you can reconnect the AirPods Max to your devices, which will be reset to factory settings.
Does using AirPods with their case on drain the battery?
You risk losing battery power if you leave them out of the case when not in use. You also risk being unable to use your AirPods if your AirPod case is fully charged once you charge both the AirPod case and AirPods. Your usage level will determine how long the batteries in your AirPod case last
Conclusion
You should be able to use both sides of your AirPods without problems now that you have tried all the above solutions. Even if the problem reappears down the road, at least you now know what to do. Now, you have access to a thorough explanation of the Apple AirPods flashing green light.
After attempting the fixes above, you should be able to use both AirPods simultaneously. Furthermore, you’ll be ready even if you encounter this issue again in the future. Since you’ve already read this guide, have you discovered any additional fixes that this guide missed? If you have any, please share them in the comments so we can add them for future readers.
We hope you found our article on the AirPods flashing green. Please feel free to leave your comments in the section below if you have any questions or suggestions. When we can, we’ll respond to you. For more details, visit our website headphoneblogs.com, to explore a wide range of headphones and earplugs to help protect your hearing in any situation.